Create a Sectioning Sandbox Run (Split Phase) |

|

|

|

|
To create a new sectioning sandbox run (split phase), perform the following:
1.Click the Sandboxes option on the Academics tab.
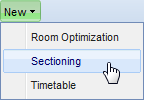
2.On the Sandbox List page, click New and select the Sectioning option.

3.On the Settings tab of the Sectioning sandbox form, enter a name for your Sectioning sandbox run.
4.Select either Sectioning Term or Master Sandbox Run as your data source.
Selecting Sectioning Term indicates that this sectioning run will be a first tier run for a selected term. With this option, students must also be specified to be included in the run.
Selecting Master Sandbox Run indicates that this sectioning run will be added to a chain of sandbox runs used to model sectioning into the future. With this option, the same students are included in the run as were included in the source data.
5.Depending on the data source, choose the master source Sandbox Run and/or the Sectioning Term for the sandbox.
6.Select the Simulated Student Sandbox Run on which to base this sectioning run. The simulated student sandbox determines the number and type of simulated new and/or departing students to consider during sectioning.
7.If the data source is Sectioning Term, then click Select Students to specify the students to be included in the run.
8.Place a check in the box next to any of the following sectioning options, as desired:
•Enforce Lock-Step Schedule
The Enforce Lock Step option ensures that students will be scheduled for the next set of courses they are eligible to take based on course bracketing in the template, regardless of any "catch-up" courses they may need. This helps to keep students scheduled along with their cohorts.
•Count Overlapped Course Load
The Count Overlapped Course Load option only needs to be selected if students can be scheduled into multiple terms at the same time. This feature accounts for any course load a student may have in an overlapping term and schedules them for courses in the current term based on any additional course load that is available. If the student has a full course load in the overlapping term, they will not be scheduled in the sectioning run being created for the current term.
•Allow Cross Campus Packing
The Allow Cross Campus Packing option allows students to be scheduled for courses on a campus other than their primary campus. The campus that has the most student need for a course will determine where the course is offered and what resources will be used.
•Save All Possible Courses
The Save All Possible Courses option shows all courses remaining in a student's program on the student record in the sectioning results. This feature provides more visibility into a student’s program and may help when moving students and resolving tentative sections. This option is checked by default but can be de-selected if desired.
•Meet Rule(s) With Template Courses Only
When the Meet Rule(s) with Template Courses Only option is selected the system will apply student academic history to satisfy program rules based ONLY on rules and courses outlined on their program template. When this option is de-selected, the system will expand its view to include courses that may satisfy rules in the parent program version as well. In other words, this feature determines how the system should count a course that counts toward a program rule but that was removed from the template.
9.Enter Sectioning Optimization Weights, totalling 100%.

![]() NOTE: Placing an emphasis on Efficiency attempts to create the least number of sections at the possible expense of student cohorts and individual student course loads. Placing an emphasis on Cohort attempts to create the least student conflicts at the possible expense of individual student credit loads and numbers of sections. Placing an emphasis on Student attempts to create the best individual student schedules based on credit load at the possible expense of the student cohorts and number of sections.
NOTE: Placing an emphasis on Efficiency attempts to create the least number of sections at the possible expense of student cohorts and individual student course loads. Placing an emphasis on Cohort attempts to create the least student conflicts at the possible expense of individual student credit loads and numbers of sections. Placing an emphasis on Student attempts to create the best individual student schedules based on credit load at the possible expense of the student cohorts and number of sections.
Experiment with these inherent trade-offs until the desired mix is attained.
10.Click Save to save and initialize the sectioning run.

The run is saved to the list and performed immediately. A progress bar is displayed in the list grid.
The sectioning run status is updated upon completion: ![]() .
.
11.When completed, you may click the sectioning run Name to view the initial split phase results.
See Sectioning Results for more information.