Student List Page |

|

|

|

|
Student records are imported into Astra Schedule for the purpose of Platinum Analysis, Sectioning, Timetabling, and Simulated Registration. Astra Schedule uses students' programs of study and academic history to determine demand for courses. The Student List Page provides a list of all students that have been imported into the system along with their attributes. Users can filter and sort student records for informational purposes, as well as apply students to Availability Templates, Course/Credit Loads, and Terms.
To access the student list page, click the Students option on the Analytics tab in the application. The list of students in the system is displayed.
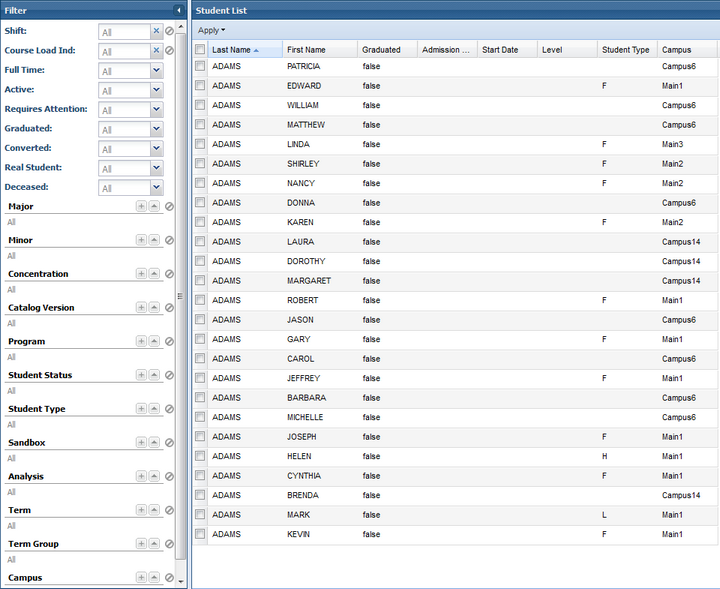
Because the number of students may be quite large, various student attributes are provided as filter options so that a user may narrow the list being returned. Use any of the filter options applicable to your institution to find certain student populations. Note that depending on your institution's data, all of the attributes provided may not be populated.
The student list page is used to identify students and then apply default availability templates and course/credit loads, as well as associate them with terms or term groups prior to Sectioning.
To begin, first select the students you would like to update by either individually checking the box next to their names or by choosing the "select all" option, as shown.
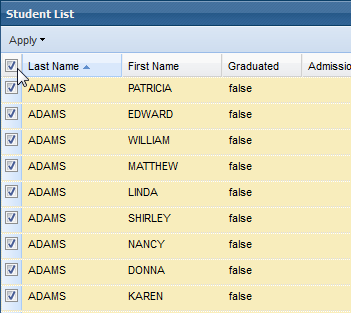
Once students are selected, click ![]() and choose the item you wish to apply to the selected students.
and choose the item you wish to apply to the selected students.
To apply an Availability Template to selected students, perform the following:
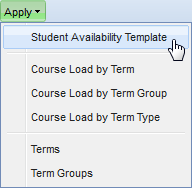
1.Select the Student Availability Template option from the Apply drop-down menu.
2.Select the applicable Student Availability Template from the drop-down list.
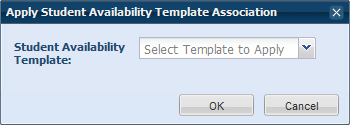
3.Click OK.
4.Continue as needed until all students have a default availability template applied.
Course or credit loads are applied to students so that the Sectioning algorithm knows how many courses or credits to assign to the student. To apply course or credit loads to selected students, perform the following:
1.Select a Course Load option from the drop-down menu. You may apply course or credit loads based on the Term, Term Group, or Term Type.
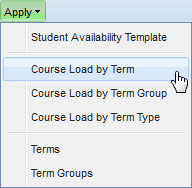
2.Using the Apply Course Load window, choose the Term, Term Group, or Term Type you would like associated with the default load, as applicable.
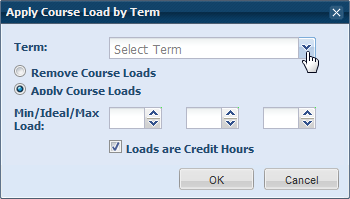
3.Enter the Minimum, Ideal, and Maximum load values in the appropriate boxes. These values can represent either courses or credits, depending on your business practice. Check or uncheck the Credit Hours flag as needed to represent courses versus credits.
![]() NOTE: The same exercise may be used to REMOVE a default configuration by selecting the Remove Course Loads option before clicking OK.
NOTE: The same exercise may be used to REMOVE a default configuration by selecting the Remove Course Loads option before clicking OK.
4.Click OK.
5.Continue as needed until all students have default course loads applied.
Students must be associated with either Terms or Term Groups so that the Sectioning algorithm knows which students to include. To associate Terms or Term Groups to students, perform the following:
1.Select the Terms or Term Groups option from the drop-down menu.
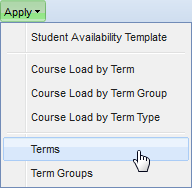
2.In the window that appears, click on the + button to select from a list of terms or groups.
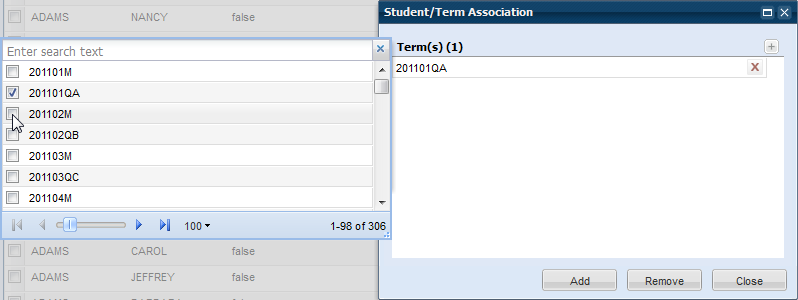
3.Select the items you would like associated with the selected students.
4.Click Add. (Alternatively, you may click Remove to remove the association with the selected items)
5.Continue associating terms or groups until completed.
Page url: ?student_list_page.htm