Run Initial Imports - Phase II |

|

|

|

|
After the Analysis Run is defined, phase II of the initial data imports may be completed.
![]() NOTE: Make sure you have configured the system settings before running imports or an analysis.
NOTE: Make sure you have configured the system settings before running imports or an analysis.
To complete phase II of the initial imports, perform the following:
1.Log in to Astra Schedule.
2.Click Import/Export Management on the Setup tab.
3.Click New Job.
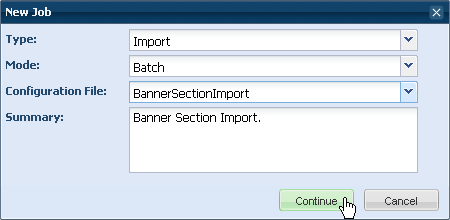
4.Select Import, Batch, and the "SectionImport" options as Type, Mode, and Configuration File.

5.Click Continue.
6.Enter a job name.
7.Enter a description (optional).
8.Select the Analysis Run previously defined from the drop-down list.
9.If there is a “Start at Phase:” option, set the value to 0. The “Start at Phase:” option indicates where the system should restart the import process if the system should time-out or fail for any reason. Initially, the phase must be set to 0, but other phases can be used when troubleshooting with the help of a staff member from Ad Astra.
10.Enter the User ID and Password for access to the student information system database.
11.Click Save.
12.Run the job you have just created by clicking Run Job on either the job form or the job row entry on the job list page.
A status bar will indicate progress on the list page until completion.
13.Click View Annotated Log next to the job entry on the job list page.

14.Check the log for errors. (they will be highlighted in red)
15.Repeat this import process for Students.
IF the data being used is from Banner CAPP, then repeat the above import process for Program Rules and Student Program Rules.
Otherwise, you will need to perform a non-CAPP degree audit import to populate programs and student program data, as follows:
1.Log in to Astra Schedule.
2.Click Import/Export Management on the Setup tab.
3.Click New Job.
4.Select Import, Batch, and Dars, DegreeWorks, or CampusVue options as Type, Mode, and Configuration File.

5.Click Continue.
6.Enter a job name.
7.Enter a description (optional).
8.If there is a “Start at Phase:” option, set the value to 0. The “Start at Phase:” option indicates where the system should restart the import process if the system should time-out or fail for any reason. Initially, the phase must be set to 0, but other phases can be used when troubleshooting with the help of Astra Schedule staff.
9.The sisconnectionstring will auto-populate from the system settings.
10.Select the Analysis Run previously defined from the drop-down list.
11.Enter the degree audit-specific User ID and Password.
12.Click Save.
13.Run the job you have just created by clicking Run Job on either the job form or the job row entry on the job list page.
A status bar will indicate progress on the list page until completion.
14.Click View Annotated Log next to the job entry on the job list page.

15.Check the log for errors. (they will be highlighted in red)
Next Step > Define Student Credit Loads
Page url: ?analytics_runinitialimportsphaseii.htm